
How to Reduce Mold Risk After a Water Leak: The 48-Hour Plan
A water leak is more than a surface mess; it starts a moisture timeline. According to EPA guidance, mold can begin to grow on wet building materials such as drywall, carpet padding, and wood framing within 24 to 48 hours of exposure. A structured response can reduce risk and create better documentation for repair planning.
The Science of Mold Colonization
Mold spores exist naturally in the air, but growth depends on moisture, temperature, and organic materials such as drywall paper, structural wood, and carpet fibers. Because homes contain many organic materials, controlling moisture is the key lever. Reducing relative humidity and returning wet building materials toward dry-standard readings can reduce mold risk.
The Step-by-Step 48-Hour Mold Prevention Protocol
- Stop the Water Source: Locating the leak is your first priority when safe. If the leak is from a specific sink or toilet, turn the individual isolation valve clockwise. If it is a burst pipe or water heater leak, shut off the main incoming water shut-off valve to the house.
- Extract Bulk Standing Water: Remove as much standing water as possible within the first few hours. On tile or concrete, use a heavy-duty wet-dry vacuum or squeegees. On carpets, use a high-powered carpet extractor. The more water you extract physically, the less moisture has to be evaporated into the air.
- Remove Saturated Porous Materials: Highly porous items that have absorbed dirty water or cannot be dried promptly may need removal. This can include wet cardboard boxes, paper documents, saturated carpet padding, and low-density ceiling tiles. Material decisions depend on water category, duration, and drying conditions.
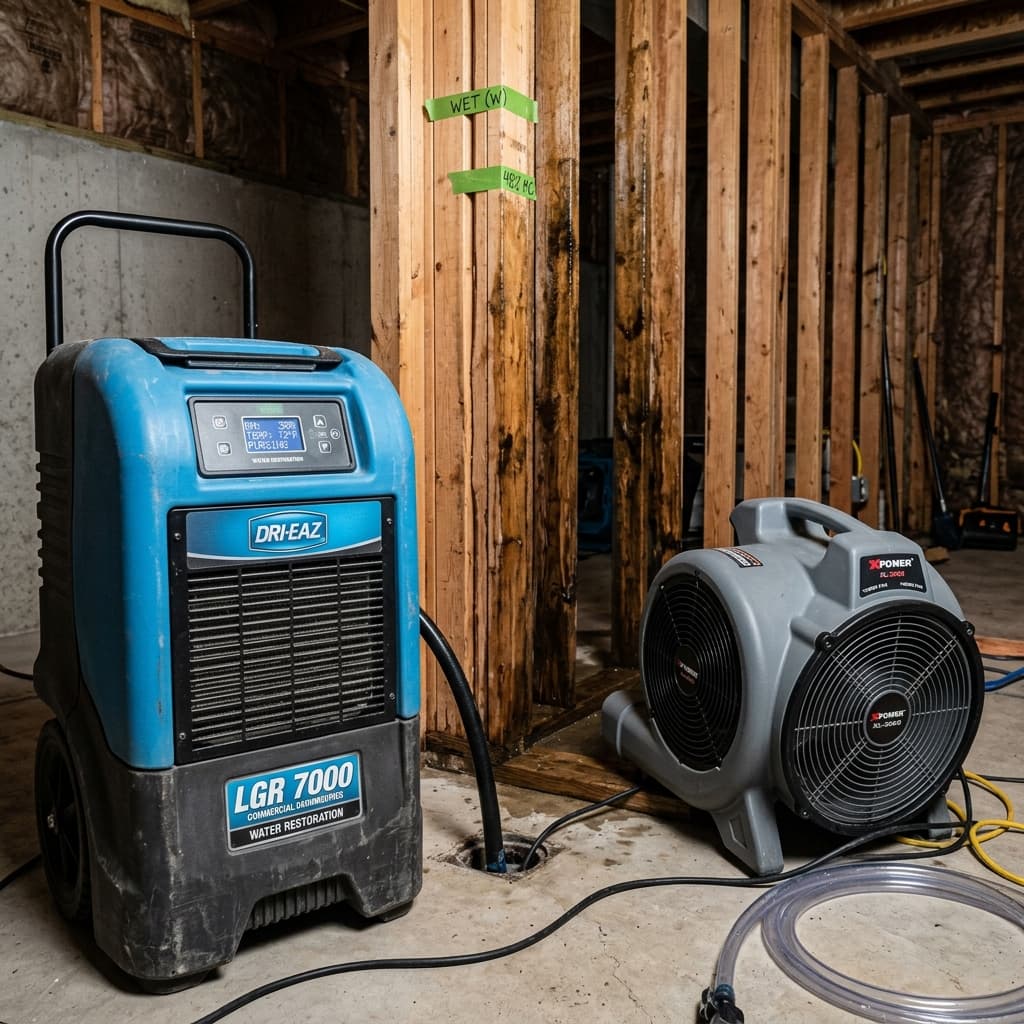
- Create High-Velocity Airflow: Evaporation is key. Set up heavy-duty circular floor fans or commercial air movers to blow air directly across wet floors and along wet walls. This high-velocity airflow pulls moisture out of the materials and into the ambient air. Ensure the air movers are positioned to create a continuous circular airflow pattern in the room.
- Deploy Active Dehumidification: Air movers release moisture into the room's air. If you do not remove that moisture, humidity can rise and condensation can occur on nearby surfaces. Run a suitable commercial or residential dehumidifier for the space. Keep windows and doors to the outside closed so the dehumidifier works on the target room's air, and monitor indoor relative humidity against the equipment or restoration plan.
- Verify with a Moisture Meter: Never assume a material is dry just because it feels dry on the surface. Moisture migrates deep. Use a pin or pinless moisture meter to check drywall, subfloors, and framing. Compare the readings to a known dry standard in an unaffected room and document progress before closing walls or installing finishes.
When DIY Has Limits
While homeowners can handle minor water spills and clean leaks affecting small areas, professional restoration guidance is recommended if:
- The water was contaminated (Category 3 sewage backup or groundwater flooding).
- Water has migrated behind finished drywall ceilings, into uninsulated wall cavities, or under hardwood floorboards where standard fans cannot reach.
- The materials have stayed wet for more than 48 hours, in which case mold may have already started to colonize the interior cavities, requiring professional containment and HEPA filtration.